Reading Time 2
Number of Words 289
Welcome to the next step in our JavaScript tutorial.
Understanding selectors allows you to find and work with elements on the page dynamically.
Let's break down the different selector methods and use practical, modern examples you can apply directly to your project.
Why Are Selectors Important?
Selectors are key for interacting with the DOM: they help you read, change, or remove elements, and respond to user actions. Choosing the right selector keeps your code maintainable and efficient.
The Main Selector Methods
1. getElementById
Finds one element by its unique ID.
const header = document.getElementById('main-header');
header.textContent = 'Welcome to Lookkle!';
2. getElementsByTagName
Finds all elements by their HTML tag name (returns a live HTMLCollection).
const sections = document.getElementsByTagName('section');
for (let section of sections) {
  section.style.background = '#f4f4f4';
}
3. getElementsByClassName
Finds all elements by their class name (returns a live HTMLCollection).
const cards = document.getElementsByClassName('promo-card');
Array.from(cards).forEach(card => {
  card.classList.add('highlight');
});
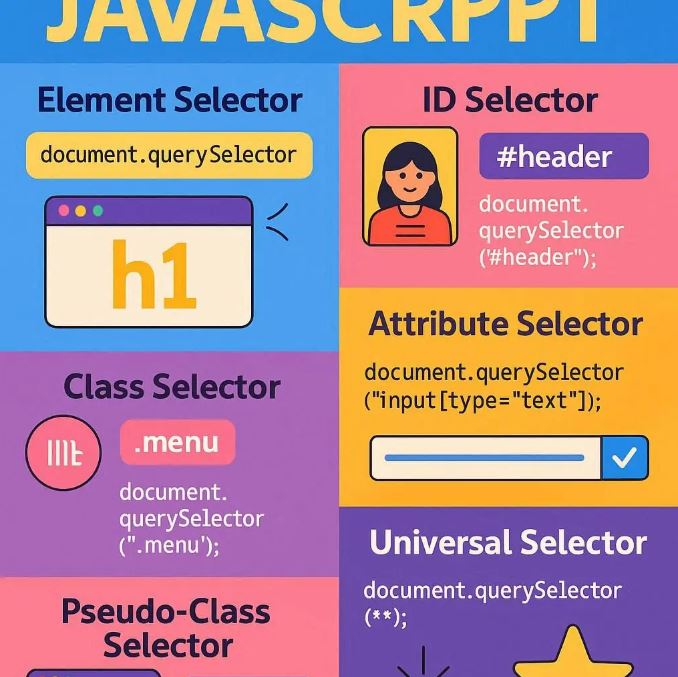
4. querySelector
Finds the first element that matches a CSS selector.
const featured = document.querySelector('.featured-item');
featured.style.border = '2px solid green';
5. querySelectorAll
Finds all elements that match a CSS selector (returns a static NodeList).
const icons = document.querySelectorAll('.icon');
icons.forEach(icon => {
  icon.setAttribute('aria-label', 'App icon');
});
Modern, Practical Examples
Adding New Elements Dynamically
const list = document.querySelector('#user-list');
const newUser = document.createElement('li');
newUser.textContent = 'New user added';
list.appendChild(newUser);
Removing Elements Safely
const removeBtn = document.querySelector('#remove-button');
removeBtn.addEventListener('click', () => {
  const items = document.querySelectorAll('.removable-item');
  if (items.length > 0) {
    items[0].remove();
  }
});
Working Responsively with Selectors
Check if an element exists before acting, to avoid errors:
const modal = document.querySelector('#welcome-modal');
if (modal) {
  modal.classList.add('open');
}
Best Practices for Selectors
- Use class and data-attributes for scalable selection. Avoid using only IDs unless truly unique.
- Always check if your selection returns a valid element before manipulation.
- Prefer
querySelector/querySelectorAllfor flexibility with CSS selectors. - Combine selectors to target nested elements (e.g.,
.menu .menu-item). - Keep your selectors as specific as needed, but not overly verbose.
Quick Review
getElementById: Single, unique element by ID.getElementsByTagName/getElementsByClassName: All elements by tag name or class name.querySelector: First match, flexible CSS selector.querySelectorAll: All matches, returns NodeList for easy iteration.