XAMPP Installation and Configuration
What is XAMPP?
XAMPP is an all-in-one installable free software that includes the Apache web server, a MySQL database system, and the PHP and Perl programming languages.
XAMPP can be installed on any known operating system, such as Linux, Mac OS or Windows, and its main function is to have a personal computer as a local test web server.
Its ease of installation and configuration stands out mainly, since in a few seconds the server can be ready and configured to use on the PC.
Download XAMPP
We open our favorite Web browser, either Chrome, Mozilla, Edge or Safari. Enter the download area of the ApacheFriends website "https://www.apachefriends.org/download.html" and download the latest version of XAMPP.
We must observe that the latest version of XAMPP corresponds to the latest version of PHP, and this can sometimes generate incompatibilities with other versions of PHP, due to PHP functions that are no longer used or are updated, so if we want to practice with a website that uses old php versions, we must download the corresponding version, or update our website to newer PHP versions, the most recommended.
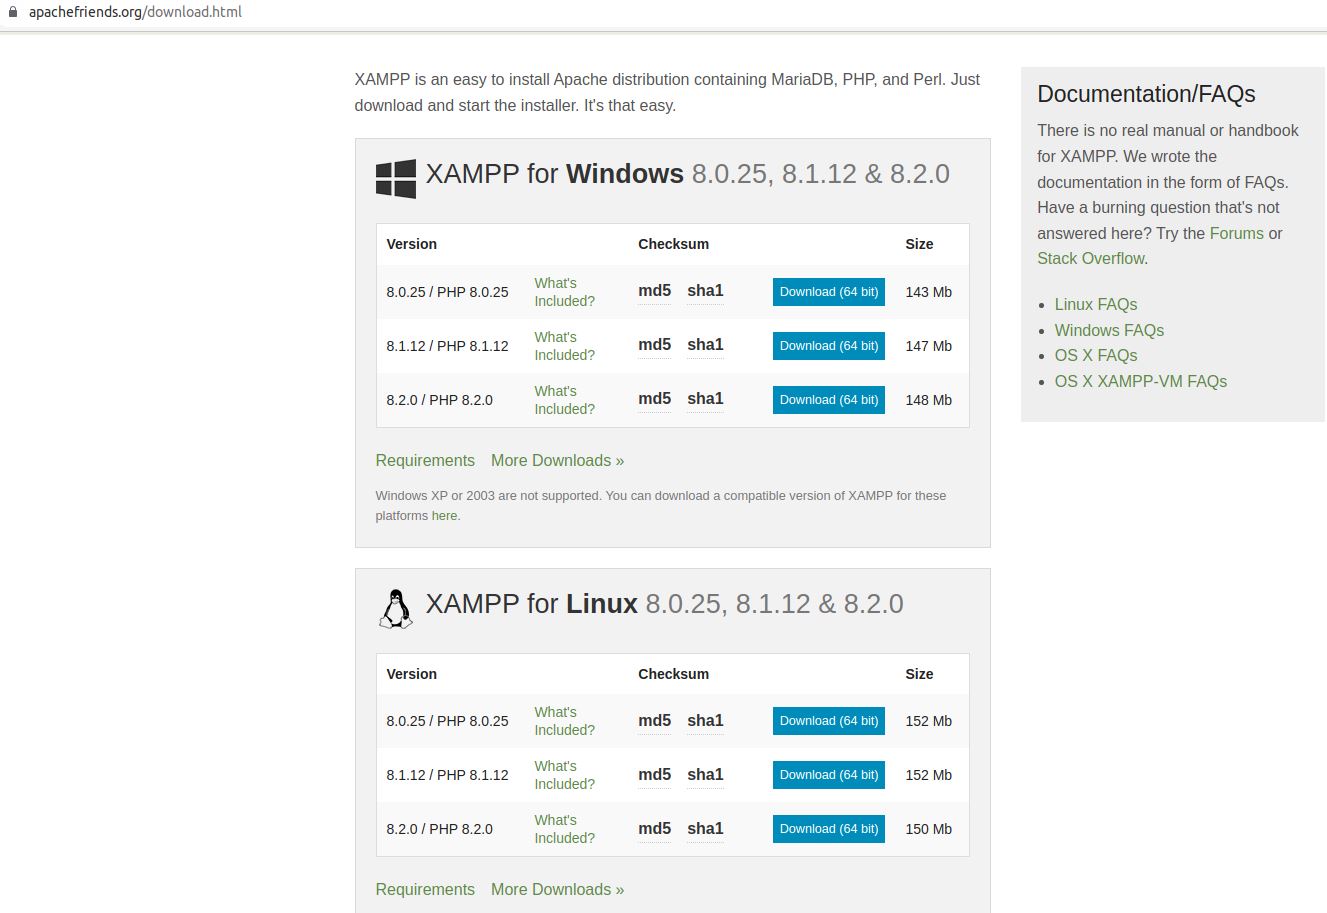
We download the corresponding version according to the operating system we are using, Windows, Linux or OS X.
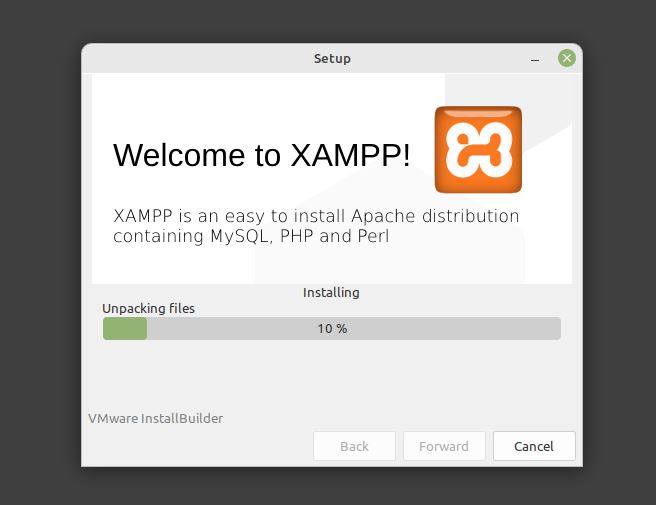
XAMPP installation
From the Downloads folder of our computer we click directly on the file, in the case of Windows, to automatically start the installation.
In Linux we must grant, in most of the cases, execution permissions to start the installation automatically, or execute the file from the terminal as superuser. That is, from the "Downloads" folder, type:
sudo ./xampp-linux-x64-8.2.0-0-installer.run

Press the "Forward" button and select the components that we want to install. In this case we will select the components for Developers, Apache, PHP, phpMyAdmin, MySQL, Perl, where phpMyAdmin is the web and graphical environment where MySQL will be managed.
Once the components to install have been chosen, we will select the folder where XAMPP will be installed, and following the steps, the installation of XAMPP will begin automatically.
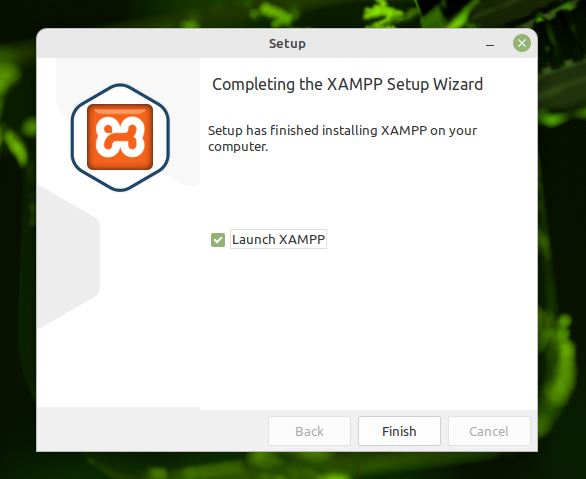
Once XAMPP is installed, we launch the application automatically keeping the "Launch XAMPP" tab activated.
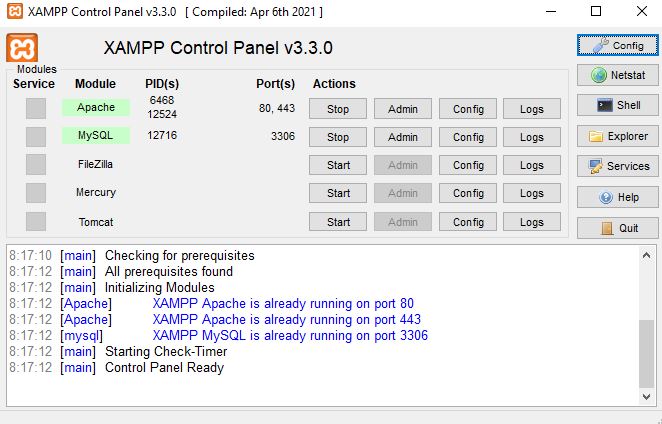
XAMPP Control Panel
From the XAMPP Control Panel we will choose the modules that we want to start, which will be the ones on which we will work our website in the future.
We can run Apache and Mysql, simply by clicking on the "Start" button on each of them.
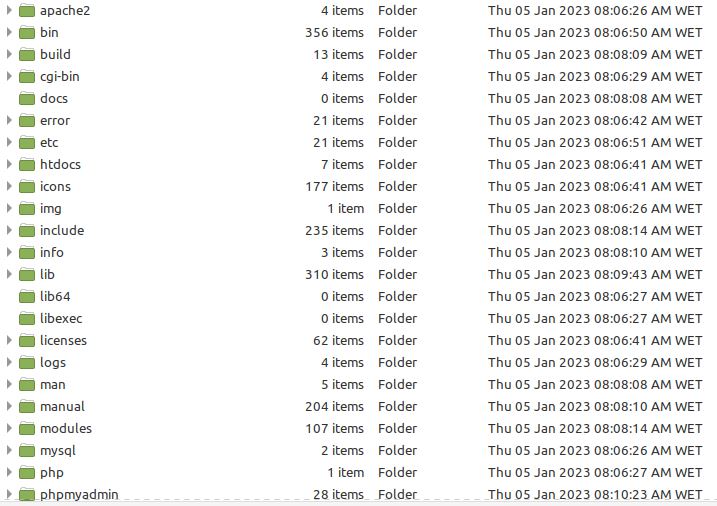
XAMPP Installation folders on Windows and Linux
We check that our elements have been installed correctly by looking for the location in Windows "C:\xampp", or in Linux "/opt/lampp/". Inside this folder we check that there are the apache, mysql and php folders corresponding to the installation folders of the installed modules.
Observations before the first execution of XAMPP
In Windows, the Firewall will ask us if we want to allow the access of the started elements, we must click on the "Allow access" button.
In linux we must check not to have previously installed apache or mysql as services in the system so that there are no compatibilities.
We use the command in the terminal:
service apache2 status
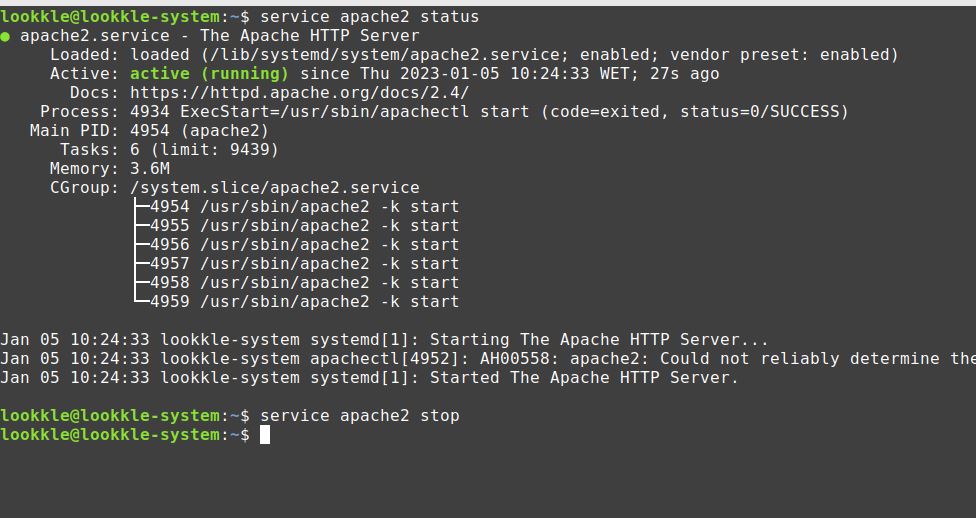
If they are installed, we check in the terminal with the "service" command and stop the service.
service apache2 stop
Same with MySQL
service mysql status
service mysql stop
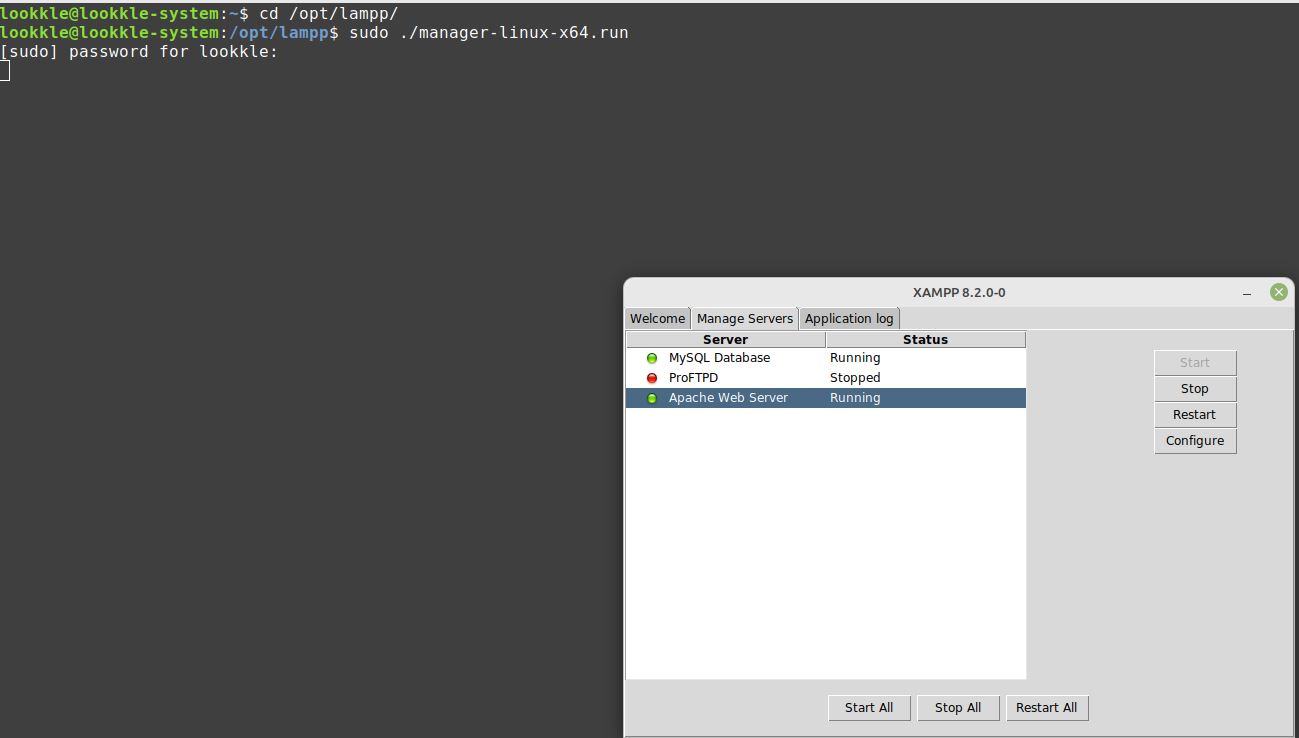
First run of XAMPP
We start the XAMPP administration panel from the "/opt/lampp/manager-linux-x64.run" in Linux, this time as an administrator from the terminal, or double click in "C:/xampp/xampp-control.exe" for Windows.
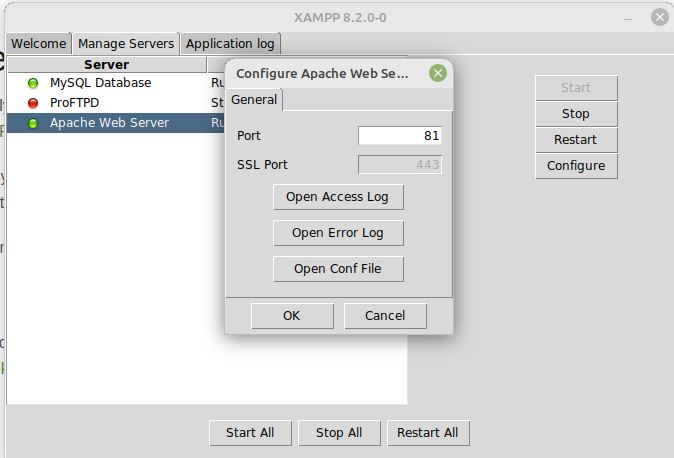
Extra Settings in XAMPP
We can change the port where each service will be executed from the specific configuration of each one in the XAMPP panel.
For example, we can configure Apache on port 81, this can free us from incompatibilities with other services, although as a general rule, the Web Server Service always uses the specific port 80, and it is difficult for execution problems to occur when there is another process using the same port.
Display of the main XAMPP website
We start "Xampp Control Panel" and a Web Browser such as "Google Chrome". In the address bar of Chrome we write localhost. The “localhost/dashboard” website corresponding to the initialization of the Apache web server with support for the PHP language and MySQL database should be started automatically.
If we have configured port 81 with Apache, just write "localhost:81" in the Chrome address bar.

The Xampp control panel will always remain active in the lower right area of Windows, or as a normal program in linux.
Main folder where to host our websites
Within the main XAMPP folder we have the "htdocs" folder that corresponds to the folder where we will locate our web projects and which will be executed in the web browser.
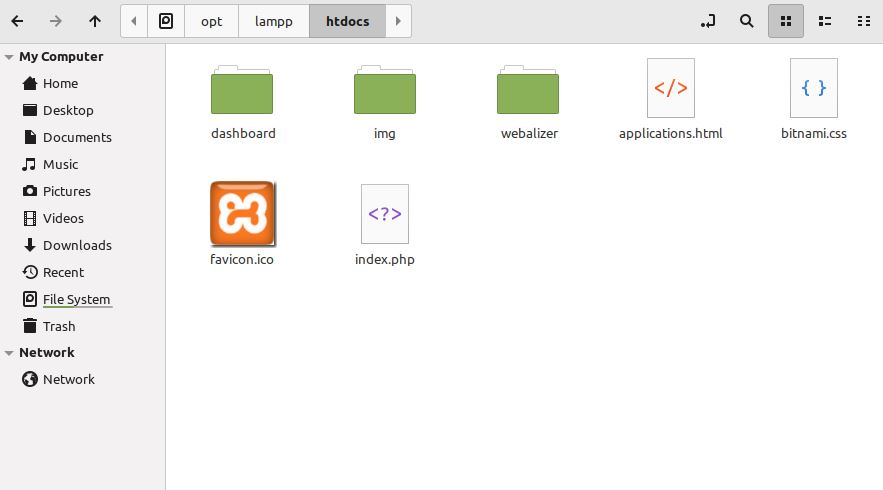
The content of the web folder “C:\xampp\htdocs” (Windows) or “/opt/lampp/htdocs” (Linux) contains the “index.php” file that is currently being displayed in “Google Chrome”. We can modify this file in a web editor such as "Notepad ++", "Sublime Text", "Netbeans" or "Visual Studio Code" and edit our own content to display it in the web browser.
XAMPP and MySQL default menu
The content shown by XAMPPweb in our browser will give general information and some links of interest, in addition to showing a main menu at the top.
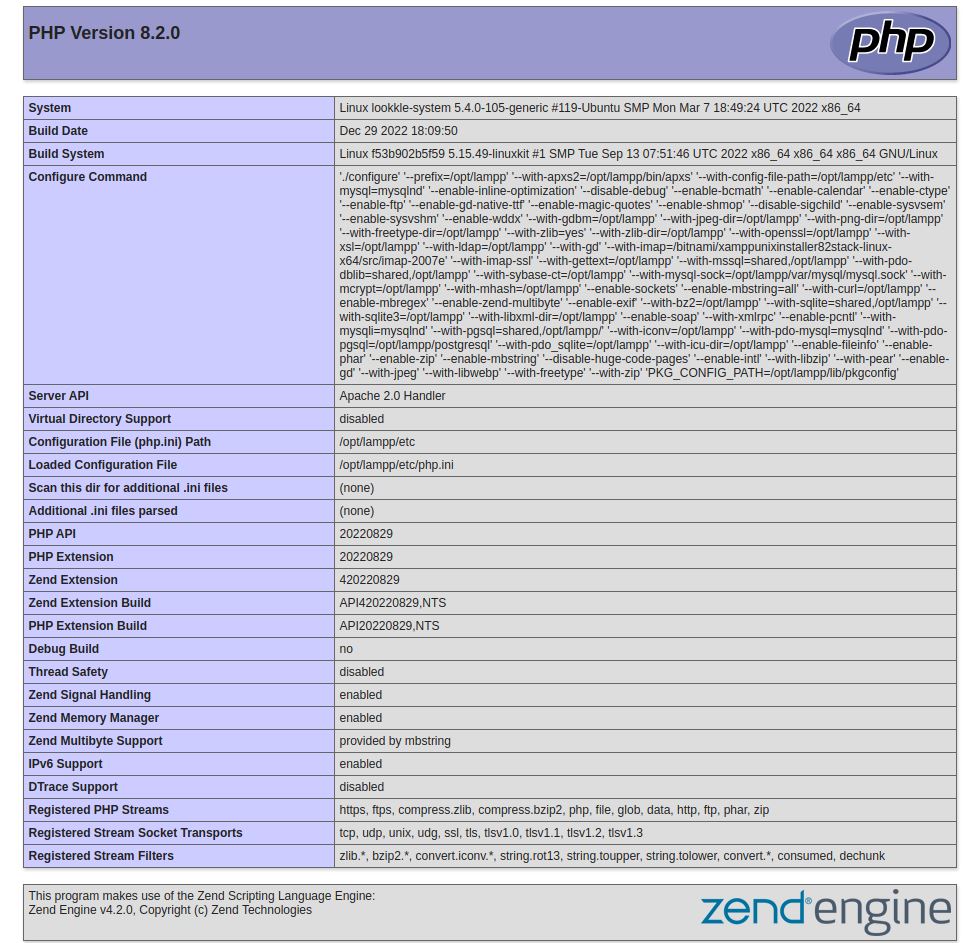
The menu will give us PHP information inside the PHPInfo link.
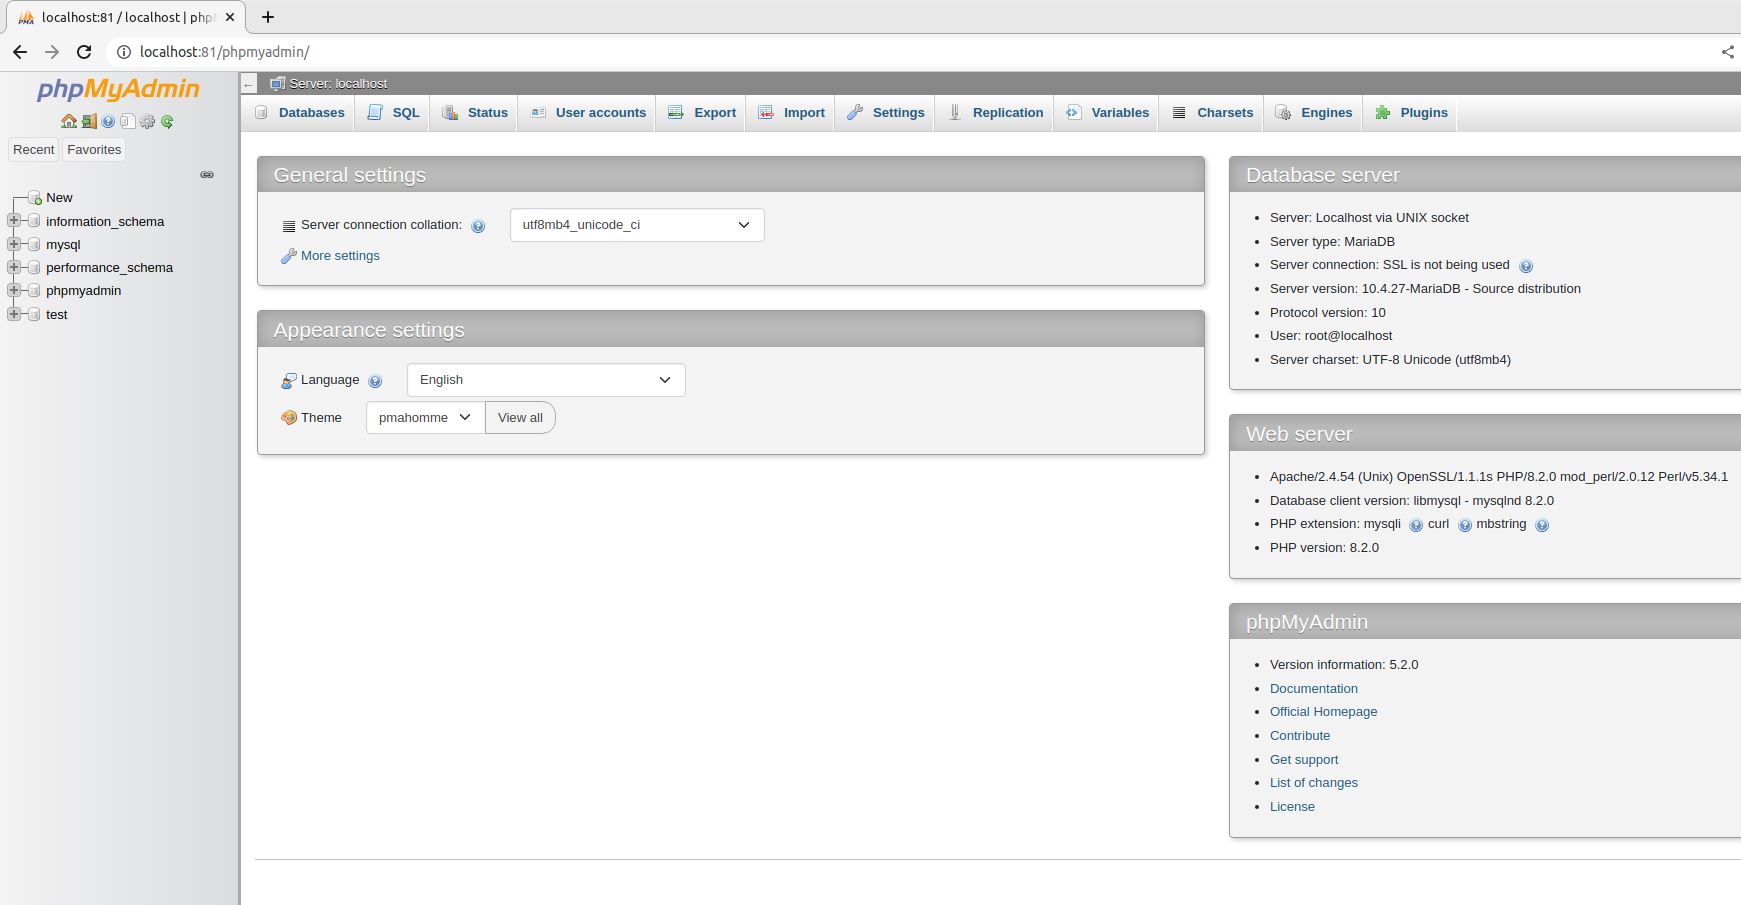
We can also access phpMyAdmin to see the content of our MySQL databases.
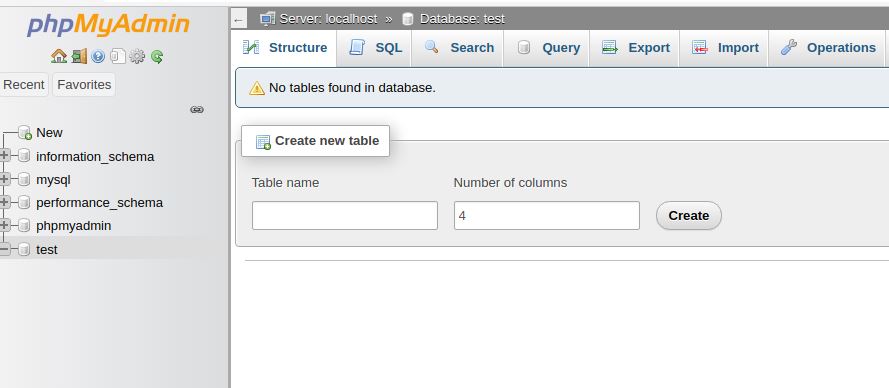
 We can see the content of the databases available in the system, where the menu on the left contains the name of each of the databases created. If we click, for example, on the test database we can see its content. Within the test database we can create tables and from there content.
Creating our first website in XAMPP
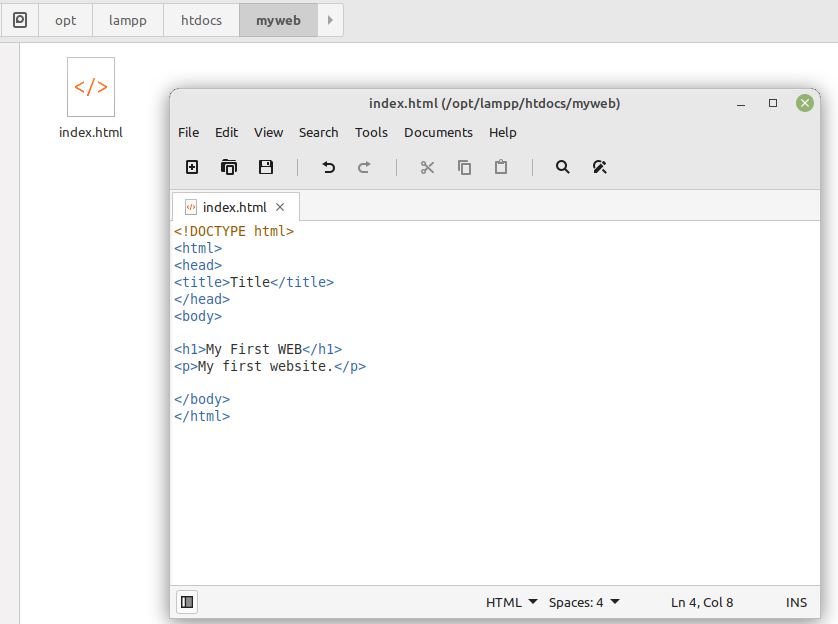
We will create a folder called "myweb" inside the main "htdocs" folder.
In this folder we will create a standard file within our basic text editor called "index.html", and we will put the following content:
<!DOCTYPE html>

<html>

<head>

<title>Title</title>

</head>

<body>
<h1>My First WEB</h1>

<p>My first website.</p>
</body>

</html>
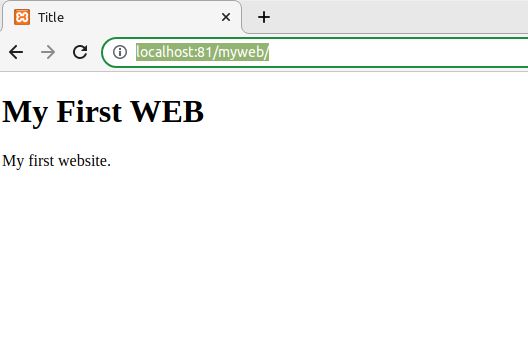
Once our file is saved, we will show it in our web browser by typing in the address bar:
localhost:81/myweb/
Canonical URL: XAMPP Installation and Configuration