Installing Ubuntu on a USB drive offers users a flexible and portable computing experience.
Whether you're looking to experiment with Linux, troubleshoot any issues on multiple systems, or have a secure operating system you can take wherever you go, installing Ubuntu on a USB drive is an excellent solution.
Download Ubuntu ISO File.
To begin, head over to the official Ubuntu website and download the latest stable version of Ubuntu as an ISO file.
To download the Ubuntu ISO file, you can visit the official Ubuntu website or use the provided links to access the download page.
Here are the steps to download the Ubuntu ISO file:
1. Visit the official Ubuntu download page at ubuntu.com/download.
2. Choose the desired version of Ubuntu, such as Ubuntu Desktop, Ubuntu Server, or other Ubuntu flavors.
3. Select the appropriate architecture (e.g., 64-bit or 32-bit) based on your system requirements.
4. Click on the download link to initiate the download process.
Alternatively, you can use the following link to access the Ubuntu ISO file directly: Ubuntu ISO Download.
Minimal Requirements.
To install Ubuntu on a USB drive, you need the following minimal requirements:
- A USB drive with a minimum storage capacity of 4GB (though it is recommended to use an 8GB or higher capacity drive for better performance).
- A computer with a USB port.
Ubuntu on a USB drive for Window
To install Ubuntu on a USB drive for Windows, follow the steps below:
1. Download the Ubuntu ISO file:
Go to the official Ubuntu website (https://ubuntu.com/download) and download the appropriate version of Ubuntu for your system. Make sure to select the "Desktop" edition.
2. Download and install Rufus:
Rufus is a free and popular tool to create bootable USB drives. Download Rufus from the official website (https://rufus.ie/) and install it on your Windows computer.
3. Run Rufus:
Connect the USB drive that you want to use for Ubuntu installation. Run Rufus and select your USB drive from the "Device" dropdown menu.
4. Select the Ubuntu ISO file:
In Rufus, click on the "Select" button next to the "Boot selection" box. Browse and select the Ubuntu ISO file that you downloaded in step 1.
5. Configure Rufus settings:
Ensure that the following settings are selected in Rufus:
- Partition scheme: MBR (if your computer uses BIOS) or GPT (if your computer uses UEFI).
- Target system: BIOS or UEFI (depending on your computer's firmware).
- File system: FAT32 (default).
- Cluster size: Default.
- Quick format: Checked.
6. Create the bootable USB drive:
Click on the "Start" button in Rufus to begin the process. This will format the USB drive and copy the Ubuntu files onto it. A warning prompt might appear stating that all data on the USB drive will be destroyed. Ensure that you have backed up any important data before proceeding.
7. Wait for the process to complete:
Rufus will take some time to create the bootable USB drive. Once it finishes, close Rufus.
8. Restart your computer and boot from the USB drive:
Restart your computer and access the boot menu. The specific key to access the boot menu (e.g., F12, Esc, Del) varies depending on your computer manufacturer. Consult your computer's manual or search online for instructions on accessing the boot menu. Select the USB drive as the boot device.
If you have questions about the boot configuration of your PC, below we indicate different ways to access it from any device.
9. Install Ubuntu:
After booting from the USB drive, the Ubuntu installer will launch. Follow the on-screen instructions to install Ubuntu on the USB drive. You can choose to install it alongside Windows or overwrite Windows completely. Make sure to select the USB drive as the installation destination.
10. Complete the installation:
Once the installation is complete, restart your computer and remove the USB drive. Your computer should boot into Ubuntu from the USB drive.
Ubuntu on a USB drive for Mac
To install Ubuntu on a USB drive for Mac, follow these steps:
1. Download the Ubuntu ISO file:
Visit the official Ubuntu website and download the latest version of Ubuntu for Mac.
2. Prepare the USB drive:
Format the USB drive to the MS-DOS (FAT) format using Disk Utility. Be sure to back up any important data on the USB drive as this process will erase everything on it.
3. Create a bootable USB drive:
Open Terminal on your Mac.
1. Open the "Finder" application.
2. Go to the "Applications" folder.
3. Open the "Utilities" folder.
4. Double-click on the "Terminal" application.
Use the "diskutil list" command to identify the identifier of your USB drive (e.g., /dev/disk2).
Then, use the following command to create a bootable USB drive, replacing the [path/to/ubuntu.iso] with the path to the downloaded ISO file:
```
sudo dd if=[path/to/ubuntu.iso] of=/dev/rdiskN bs=1m
```
Note: Make sure to replace "N" in "/dev/rdiskN" with the correct identifier of your USB drive.
4. Install rEFInd Boot Manager (optional):
This step is optional but can enhance the boot process for Mac. Download and install rEFInd Boot Manager from the official website. It allows for better compatibility and easier booting into Ubuntu.
5. Disable SIP (System Integrity Protection):
Restart your Mac and hold down Command + R to enter Recovery Mode. Open Terminal from the Utilities menu and enter the following command to disable SIP:
```
csrutil disable
```
Restart your Mac normally.
6. Boot from USB drive:
Connect the USB drive to your Mac and restart it. While the Mac is restarting, hold down the Option (or Alt) key to access the boot menu. Select the USB drive (usually labeled "EFI Boot") to boot from it.
7. Install Ubuntu:
Once Ubuntu boots from the USB drive, select "Install Ubuntu" from the menu. Follow the on-screen instructions to set up Ubuntu on your Mac. During the installation process, you will be asked to select the installation destination; choose the USB drive.
Note: Be cautious and ensure you are selecting the USB drive as the installation destination, as this process will wipe the drive.
After the installation is complete, you will have Ubuntu installed on your USB drive, and you can boot into Ubuntu on any Mac by running it from the USB drive.
Configure BIOS Settings
To access the BIOS on a computer, you typically need to press a specific key or a combination of keys during the startup process, before the operating system loads.
The key or keys to access the BIOS may differ depending on the manufacturer, model, and version of your computer.
Here are some common keys to access the BIOS on different computers:
- ASRock: F2 or DEL
- ASUS: F2 for all PCs, F2 or DEL for motherboards
- Acer: F2 or DEL
- Dell: F2 or F12
- ECS: DEL
- Gigabyte / Aorus: F2 or DEL
- HP: F10
- Lenovo (Consumer Laptops): F2 or Fn + F2
- Lenovo (Desktops): F1
- Lenovo (ThinkPads): Enter then F1
- MSI: DEL for motherboards and PCs
- Microsoft Surface: Volume Up
The method of accessing the BIOS setup on Windows and Linux computers may vary depending on the manufacturer, model, and version of your computer. However, a common way to enter BIOS setup is to press a specific key or a combination of keys during the startup process, before the operating system loads. Some of the most common keys are F1, F2, F10, F12, DEL, or Esc.
If you are using Ubuntu and need to access the BIOS/UEFI directly from the OS, you can run the command `sudo systemctl reboot --firmware-setup`, which reboots the machine into the BIOS/UEFI setup.
Modifying BIOS Settings
- Once in the BIOS or UEFI settings, you can navigate and change options using the arrow keys, Enter key, and Esc key. Common BIOS options include boot order and date and time settings.
- Navigate to the boot options. Look for the "Boot Order," "Boot Priority," or "Boot Sequence" setting.
- Change the boot order to prioritize the USB drive. Move the USB drive to the top of the boot order list to ensure the computer boots from the USB drive first.
- After making changes, save and exit the BIOS setup menu by pressing F10 or choosing the "Save and Exit" option.
Install Ubuntu. Configure Installation Settings
With the bootable USB drive ready and BIOS settings configured, restart your computer.
Once the system boots from the installation media, you will see the Ubuntu installer screen. Select your preferred language and choose either to try Ubuntu without installing or to directly install Ubuntu.
Follow the on-screen instructions to configure language, keyboard layout, and other settings. When prompted to choose an installation type, select 'Something Else' to manually partition the USB drive.
Partition the USB Drive
In the partitioning stage, select the USB drive you plugged in earlier. Create a new partition, making sure to select 'Primary' and 'Ext4' as the partition type. Assign the root ('/') file system and set the partition as the mount point. Click 'OK' to confirm.
Complete the Installation
Proceed with the installation and provide necessary information, such as your location and user details. Once the installation is complete, restart your computer, ensuring not to remove the USB drive.
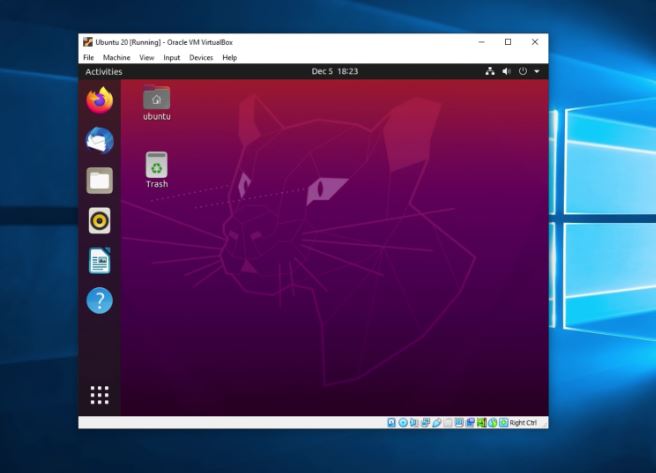
Ubuntu on a USB Drive
At this point, you should have successfully installed Ubuntu on your USB drive. Keep the USB drive connected to your computer and boot from it whenever you want to use your portable Ubuntu system. Note that the USB drive will operate slightly slower than a regular installation due to the limitations of USB transfer speeds.
Benefits and Use Cases of a Portable Ubuntu System
1. Experimentation: Try out different software, configurations, or packages without affecting your primary operating system.
2. Troubleshooting and Recovery: Diagnose and troubleshoot issues on multiple systems using a consistent, known working environment.
3. Privacy and Security: Carry a secure, encrypted operating system with you to securely browse the internet or access sensitive information.
4. Travel-Friendly: Have your personalized Ubuntu setup on the go, ready to use on any compatible computer.
Conclusion
Installing Ubuntu on a USB drive gives you the flexibility of a portable operating system for experimentation, troubleshooting, privacy, and convenience. With our step-by-step guide, you can easily set up your own bootable Ubuntu USB drive and enjoy the benefits of this portable computing solution. Happy Ubuntu-ing!
Remember, optimizing for SEO involves using relevant keywords, unique content, and easy navigation. Use this article as a starting point and ensure you tailor it to your specific SEO requirements.