Reading Time 3
Number of Words 539
If we have the need to change our username in Ubuntu or add a new one either because we work in a company where several users are going to connect to the same system, or in our personal computer we want to add more users either out of personal necessity or because we have more members in the family, we only have to execute a few commands inside our Ubuntu terminal.
How do I change my username in Ubuntu Version 2025 HERE
List the users available in the system
To see if our user is not created, we can list the users available in the system.
sudo cat /etc/passwd
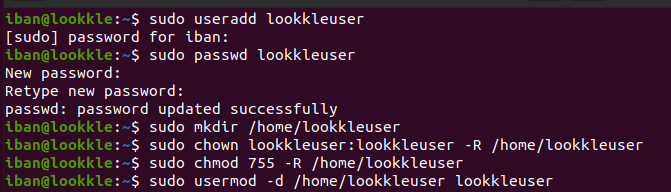
Create the user
I create the user:
sudo useradd lookkleuser
I add a password to the user:
sudo passwd lookkleuser
Create the user folder
Now we create the user folder.
sudo mkdir /home/lookkleuser
We put the user we have created as the owner of that folder.
sudo chown lookkleuser:lookkleuser -R /home/lookkleuser
With the “-R” parameter we indicate that we are going to assign the owner of that folder to the indicated user, and also to all the subdirectories and files it contains.
We assign the attributes of "755".
sudo chmod 755 -R /home/lookkleuser
The "-R" parameter does the same as in the previous command.
And we assign the folder to the user as his personal folder
sudo usermod -d /home/lookkleuser lookkleuser
With the “-d” parameter we indicate that we are going to assign your personal folder.
Using the “adduser” command
Now it only remains to assign which groups it will belong to. We can do this in two ways, using the “adduser” command, or by editing the “/etc/group/” file.
If we use the “adduser” command we can do it as follows:
sudo adduser lookkleuser group
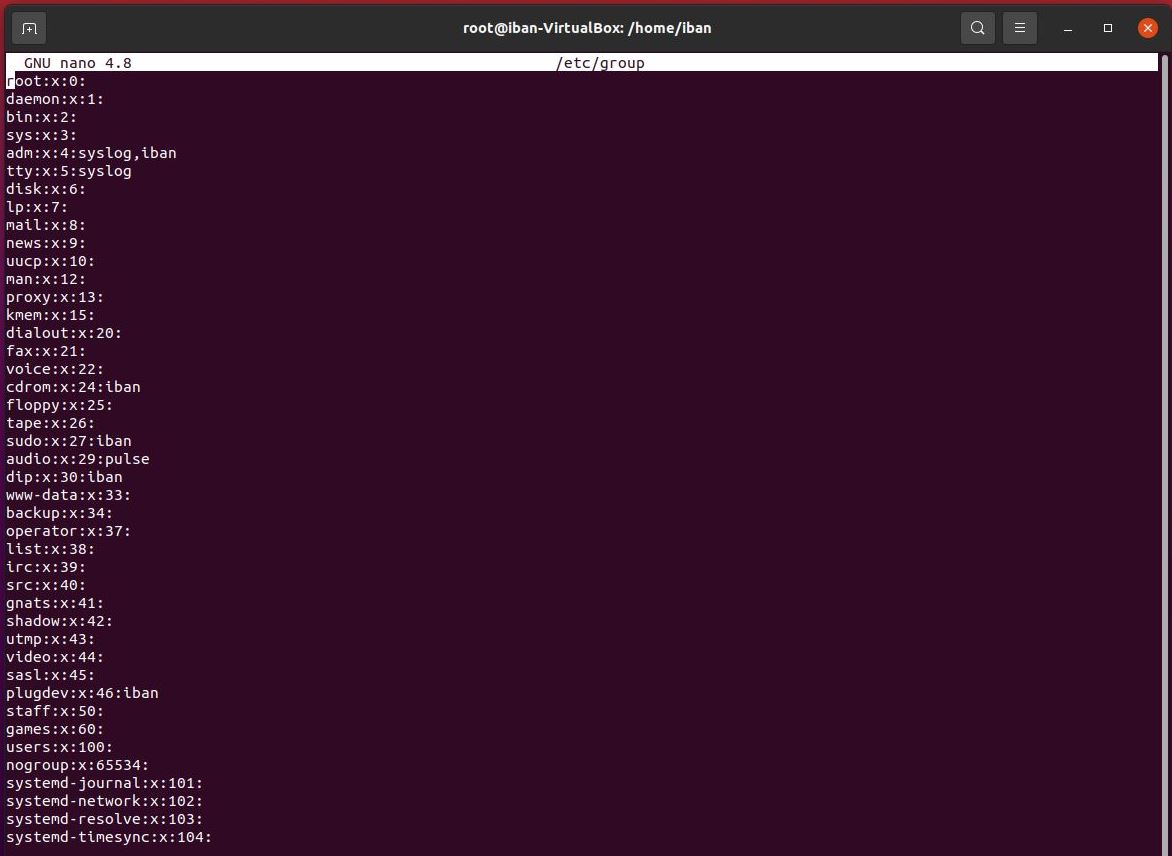
Editing the “/etc/group/” file
If I have to add him to several groups, It is better to edit the “/etc/group” file, and add the user to each group. For this we edit the file.
sudo nano /etc/group/
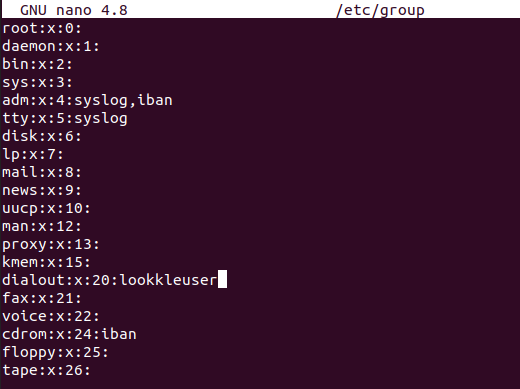
We do not move to the line of the group we want, and we add the user to the end of the line, if there is already another user, we separate it by a comma without spaces.
dialout:x:20:user1,user2,lookkleuser
Using the "usermod -s" command | Editing the “/etc/passwd” file
To finish I make sure that the shell is the one I want, in my case I like bash. To do this, I do it either with the “usermod -s” command or by editing the “/etc/passwd” file.
Using the "usermod -s" command.
sudo usermod -s /bin/bash lookkleuser
The “-s” parameter tells the command that we are going to assign a new shell.
If we decide to edit the file, we open it, and we move to the desired user, at the end the shell to be used will appear, if it is not the one we want, we change it to the desired one.
lookkleuser:x:1000:1000:User1,,,:/home/lookkleuser:/bin/bash
If we don't want it to have any shell assigned, we can assign “/bin/false” to it.
lookkleuser:x:1000:1000:User1,,,:/home/lookkleuser:/bin/false
And with this we would have our user created and configured. If we have to manage many users, and often we can create a script with all the steps.
Finally
Finally we add the user to the sudo group to give him administrator permissions.
sudo usermod -aG sudo lookkleuser
Now we can change user.
su lookkleuser
With this new user we can log in and have administrator permissions in the same way as with the default user created in the linux installation.
Now we can log out and start a new session with the new user created.