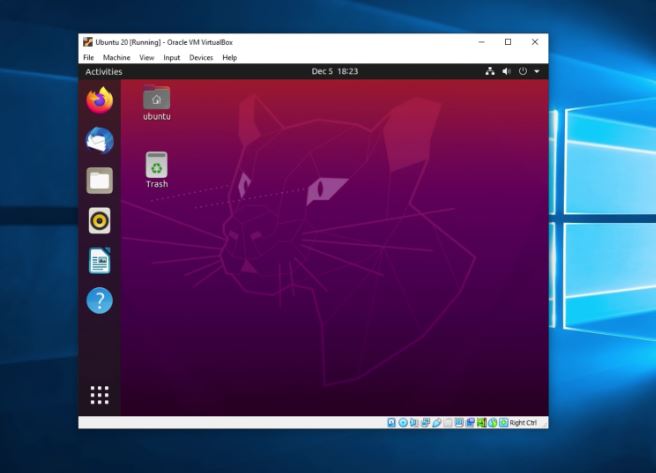
By adding Ubuntu to VirtualBox, you can enjoy the benefits of both Windows and Linux without having to dual-boot or partition your hard drive.
You can also test new features, applications, and updates on Ubuntu without affecting your main system.
Add Ubuntu to VirtualBox: Requirements
Before we start, make sure you have the following requirements:
- A computer with Windows 10 or higher
- At least 4 GB of RAM and 20 GB of free disk space
- A stable internet connection
- VirtualBox installed on your computer. You can download it from here.
- The Ubuntu ISO file. You can download it from here.
Step 1: Create a Virtual Machine for Ubuntu
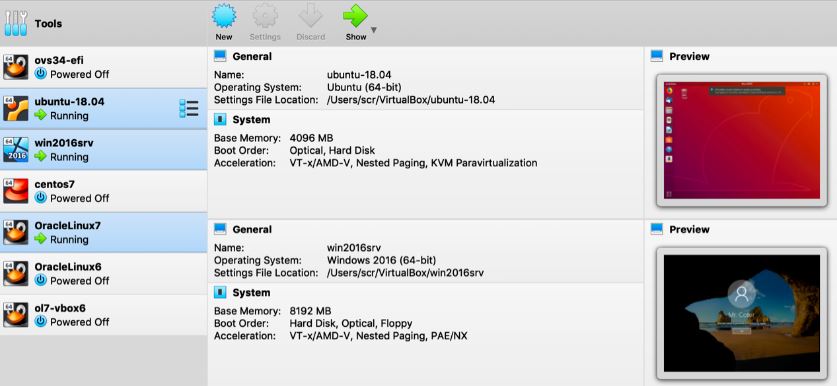
The first step is to create a virtual machine for Ubuntu in VirtualBox. A virtual machine is a simulated environment that acts like a separate computer.
To create a virtual machine, follow these steps:
- Open VirtualBox and click on the New button.
- Enter Ubuntu as the name, select Linux as the type, and select Ubuntu (64-bit) as the version. Click Next.
- Allocate the amount of memory (RAM) you want to use for the virtual machine. I recommend at least 4 GB or 4060 MB, but you can adjust it according to your system resources. Click Next.
- Choose 2 CPUs. It is equivalent to two cores within your virtual processor.
- Choose the option "Create a virtual hard disk now".
- Choose virtual hard disk size as 25 GB. I recommend at least 20 GB. It will not be the actual consumed amount of your physical hard drive, since with the chosen option, VirtualBox will consume the space on your hard drive required by the system. Click Next and Finish.
- In Settings > System > Processor, you can modify again the amount of CPU and the amount of memory of your virtual system.
- In Settings > Display, choose the maximum video memory you have available. Activate the 3D Acceleration option (important). Click Accept.
- We select our Created virtual machine from those available in the panel on the left and click on Start.
- After starting the virtual machine, it asks us to enter our Ubuntu ISO that we had previously downloaded.
- We choose our Ubuntu ISO within our primary system, and click on Mount and Reboot.
You have successfully created a virtual machine for Ubuntu. Now you need to configure some settings before you can install Ubuntu on it.
Step 2: Configure the Virtual Machine Settings
The next step is to configure the virtual machine settings to optimize its performance and compatibility. To do this, follow these steps:
- Select the Ubuntu virtual machine from the left panel and click on the Settings button.
- In the General tab, click on the Advanced tab and make sure the Shared Clipboard and Drag’n’Drop options are set to Bidirectional. This will allow you to copy and paste files and text between Windows and Ubuntu.
- In the System tab, click on the Processor tab and increase the number of CPUs to 2 or more, depending on your system resources. This will improve the speed of the virtual machine.
- In the Display tab, increase the Video Memory to 128 MB or more, depending on your system resources. This will improve the graphics quality of the virtual machine. You can also enable 3D Acceleration if your graphics card supports it.
- In the Storage tab, click on the Empty slot under the Controller: IDE section. Then click on the Optical Drive icon on the right and select Choose a Disk File. Browse to the location where you downloaded the Ubuntu ISO file and select it. This will mount the Ubuntu ISO file as a virtual CD-ROM drive.
- In the Network tab, make sure the Attached to option is set to NAT. This will allow the virtual machine to access the internet through your host network.
- In the Shared Folders tab, you can add any folders from your host system that you want to share with the virtual machine. This will make it easier to transfer files between Windows and Ubuntu. To add a shared folder, click on the Add button and select the folder you want to share. You can also choose whether you want the folder to be read-only or auto-mount.
- Click OK to save the settings.
You have successfully configured the virtual machine settings. Now you are ready to install Ubuntu on it.
Step 3: Install Ubuntu on the Virtual Machine
The final step is to install Ubuntu on the virtual machine. To do this, follow these steps:
- Start the Ubuntu virtual machine by clicking on the Start button.
- You will see a welcome screen with two options: Try Ubuntu and Install Ubuntu. Choose Install Ubuntu to proceed with the installation.
- You will be asked to select your language, keyboard layout, and other preferences. Follow the on-screen instructions and choose the options that suit your needs.
- When you reach the Installation type screen, choose Erase disk and install Ubuntu. This will format the virtual hard disk and install Ubuntu on it. Don’t worry, this will not affect your host system or any other virtual machines. Click Install Now and confirm the changes.
- You will be asked to enter your name, username, password, and other details. Fill in the required information and click Continue.
- The installation will begin and may take some time depending on your system resources and internet speed. You can watch the progress and learn more about Ubuntu features while you wait.
- When the installation is complete, you will see a message saying Installation Complete. Click Restart Now to reboot the virtual machine.
- You will be prompted to remove the installation medium (the Ubuntu ISO file) and press Enter. To do this, go to the Devices menu on the top of the VirtualBox window and select Optical Drives > Remove Disk from Virtual Drive. Then press Enter on the virtual machine.
- You will see the Ubuntu login screen. Enter your username and password and click Sign In.
Congratulations! You have successfully installed Ubuntu on VirtualBox. You can now explore and enjoy Ubuntu on your virtual machine.
Install Guest Addition in VirtualBox
VirtualBox Guest Additions are a set of drivers and applications that optimize the performance and usability of the guest operating system in a virtual machine.
To install them, you need to follow these steps:
- Download and install VirtualBox Extension Pack.
- Start and log in to the guest OS (Ubuntu) in VirtualBox.
- Go to the VM menu and select Devices > Insert Guest Additions CD Image. This will mount the CD image in the guest OS.
- A pop-up dialog will open and prompt you to run the autorun script. Click Run and enter your administrator password when asked.
- The installation process will start and show you some messages in a terminal window. Wait until it finishes and then press Enter to close the window.
- Restart Ubuntu to activate the guest additions.
Install Guest Addition from Ubuntu Terminal
- Make sure your system is up to date and has the necessary tools to compile kernel modules. To do this, run the following command:
sudo apt update && sudo apt upgrade && sudo apt install build-essential dkms linux-headers-$(uname -r) -
In the VirtualBox window, go to the Devices menu and select Insert Guest Additions CD Image. This will mount a virtual CD on your Ubuntu machine.
-
Open the terminal and navigate to the directory where the CD has been mounted. Typically this is /media/<user>/VBox_GAs_<version>, where <user> is your username and <version> is the version of VirtualBox you are using.
For example:
cd /media/lookkle/VBox_GAs_7.0.12 - Run the installation script with administrator permissions. This will compile and install the kernel modules needed for Guest Additions.
For example:
sudo ./VBoxLinuxAdditions.run
- Wait for the process to finish and restart your virtual machine for the changes to take effect.
Conclusion
In this tutorial, you learned how to add Ubuntu to VirtualBox in three easy steps:
- Create a virtual machine for Ubuntu
- Configure the virtual machine settings
- Install Ubuntu on the virtual machine
By adding Ubuntu to VirtualBox, you can experience the best of both Windows and Linux without having to dual-boot or partition your hard drive. You can also test new features, applications, and updates on Ubuntu without affecting your main system.
Tips on SEO and Online Business
Next Articles
Previous Articles
