Reading Time 8
Number of Words 1732
What it means to boot from USB
Booting from USB means telling your computer to load an operating system (or installer) that lives on a flash drive instead of the internal drive. Common uses:
-
Try a Linux “live” system without installing anything.
-
Run rescue and recovery tools.
-
Install or reinstall Windows or Linux.
-
Carry a portable OS for demos and troubleshooting.
What you’ll need
-
A USB flash drive — at least 8 GB recommended (USB 3.0 or later for speed).
-
An ISO image of the OS you want to run or install (download links below).
-
A tool to make the USB bootable (examples with links below).
-
A computer that supports USB booting (most modern PCs do).
Download OS ISOs (official pages):
-
Ubuntu: https://ubuntu.com/download
-
Fedora: https://getfedora.org/
-
Debian: https://www.debian.org/distrib/
-
Other distros: check the distro’s official website.
Tools to create bootable USBs:
-
Rufus (Windows): https://rufus.ie/
-
Ventoy (multi-ISO USB): https://www.ventoy.net/
-
balenaEtcher (cross-platform): https://www.balena.io/etcher/
-
YUMI / Universal USB Installer (multiboot options): search their official pages.
Step 1 — Get the ISO and verify it
Download the ISO file from the official site above. If the provider offers checksums (SHA256/MD5), verify the checksum to make sure the download is intact. This prevents boot/installation errors caused by corrupted downloads.
Step 2 — Create the bootable USB
General flow:
-
Insert the USB drive (back up anything on it — it will be erased).
-
Open your chosen tool (Rufus, Etcher, Ventoy, etc.).
-
Select the USB drive.
-
Select the ISO file.
-
Choose options (partition scheme, target system type, persistence) if available.
-
Start the flashing process and wait for it to finish.
Notes on tools and choices:
-
Ventoy: install Ventoy to the USB once, then copy multiple ISO files onto the drive. On boot, Ventoy shows a menu to pick the ISO. Great for multiboot.
-
Rufus: gives control over partition scheme (MBR vs GPT), file system (FAT32/NTFS), and UEFI vs BIOS compatibility — useful for Windows installers and for handling ISOs larger than 4 GB.
-
Etcher: simple cross-platform tool with minimal options — great for quick flashes.
If your ISO file is larger than 4 GB, FAT32’s file limit may create issues. Tools like Rufus and Ventoy handle this; Rufus can write using NTFS when necessary, and Ventoy supports large files by design.
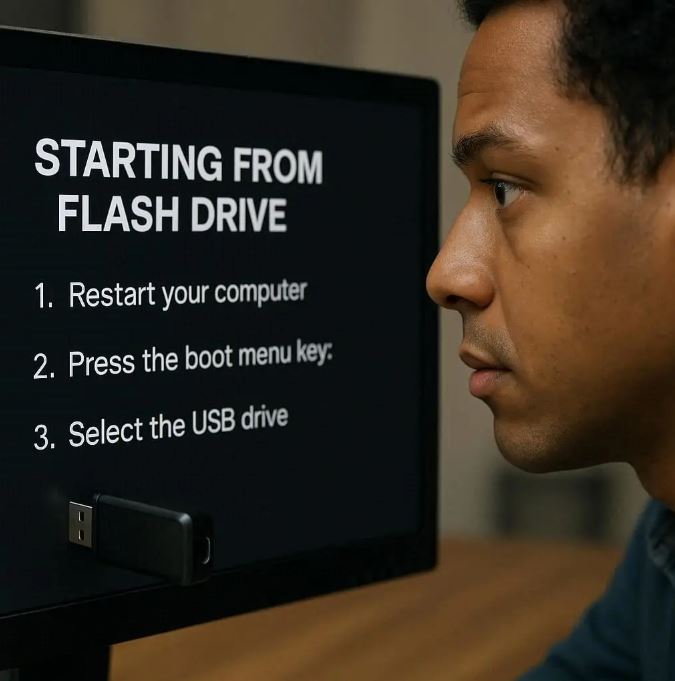
Step 3 — Access the BIOS / UEFI Boot Menu (deep dive)
This is the most critical section. “Boot from USB” fails most often because the machine won’t look at the USB device first, or firmware settings block USB booting. Below you’ll find step-by-step techniques and every common case for desktops, laptops, Macs, Chromebooks, Raspberry Pi, and virtual machines.
A. Know the difference: BIOS (Legacy) vs UEFI
-
Legacy BIOS: older systems that use MBR partitioning and a simpler boot process. You typically will see “Press F12 for Boot Menu” style prompts.
-
UEFI: modern firmware replacing BIOS. Supports GPT partitions, Secure Boot, faster boot, more options. UEFI systems often show a manufacturer logo and require different steps to reach settings.
When preparing your USB, choose MBR vs GPT in your USB tool depending on the target machine (Rufus helps with this). For modern Windows and Linux installations, GPT + UEFI is standard.
B. Common ways to get to the boot menu or firmware setup
There are two concepts to understand: one-time boot menu (temporary) and firmware setup (permanent settings). Use the one-time boot menu if available — it’s the easiest.
One-time boot menu (recommended when available):
-
Reboot with the USB inserted and press the one-time boot key right after power-on. Typical keys by vendor:
-
Dell / Alienware: F12
-
HP: Esc or F9
-
Lenovo (consumer laptops): F12 or Novo button (small pinhole or button near power)
-
Lenovo ThinkPad: F12 or Enter then F12
-
Acer: F12 (sometimes disabled by default in BIOS)
-
ASUS: Esc or F8 (depending on model)
-
MSI: F11
-
Gigabyte / Aorus: F12
-
Samsung: Esc or F12
These vary by model and BIOS/UEFI generation. When you press the correct key you’ll usually see a list of boot devices — select your USB.
-
Enter full BIOS/UEFI setup:
-
Press the firmware setup key (commonly Del, F2, or Esc) during boot to open settings. From there you can change boot order, enable/disable Secure Boot, enable legacy/CSM, etc.
Common setup keys: Del, F2, Esc, F1 (varies by vendor).
C. If you don’t see the USB in the boot menu — checklist & fixes
-
Confirm USB is properly created — try the drive on another computer to confirm it boots.
-
Try different USB ports — use USB 2.0 ports if USB 3.0 ports are not initialized by firmware. If the machine has both types, plug into a USB 2.0 port for older firmware.
-
Disable Fast Boot / Fast Startup — some UEFI fast boot options skip USB initialization, making the device invisible. Turn off Fast Boot in firmware. Windows also has “Fast Startup” (hybrid shutdown) which can interfere with reboot behavior; disable it via Windows power options if needed.
-
Enable Legacy/CSM support — older images or MBR USBs sometimes require the Compatibility Support Module (CSM) enabled in UEFI. Use this if the USB only supports BIOS mode.
-
Enable USB boot or legacy USB support — some firmware has toggles that permit or block booting from USB. Make sure “USB Boot” is enabled.
-
Check Secure Boot — many modern UEFI systems block unsigned bootloaders when Secure Boot is on. For Linux live images, most major distributions are signed and boot fine with Secure Boot enabled; for custom images you may need to disable Secure Boot or enroll a key. For Windows installers Secure Boot normally works fine.
-
Check USB drive format — if the drive is formatted with an unusual filesystem, firmware may not recognize it. Tools like Rufus prepare the drive correctly.
D. Dealing with Secure Boot, TPM, and signed bootloaders
-
Secure Boot enabled: allowed bootloaders must be signed. Ubuntu, Fedora, Windows installer images are usually signed and will boot. If you get a “Secure Boot Violation” or “Invalid signature,” you can either disable Secure Boot temporarily in UEFI settings or use a signed image.
-
TPM / BitLocker: if the internal drive uses BitLocker or other disk encryption, installing a new OS or changing firmware settings can trigger recovery prompts. Back up keys/passwords before modifying firmware.
-
If you must keep Secure Boot on: use an OS image that supports Secure Boot or use tools that support signed boot entries.
E. Vendor-specific, device-specific and special cases
Windows laptops (common)
-
Use the one-time boot key (often F12 or Esc→Boot Menu). If the key does nothing, power off completely and press the key repeatedly immediately after pressing the power button.
-
If the system boots back into Windows automatically, disable Fast Startup and try again.
Lenovo “Novo” button
-
Many Lenovo consumer laptops have a tiny Novo button (pinhole) that, when pressed with the machine off, opens a recovery/boot menu. Use that to select USB.
Dell
-
Press F12 during startup for one-time boot. Newer Dells have UEFI shells and Secure Boot — use the Boot Options menu to enable legacy if necessary.
HP
-
Press Esc then F9 or F12 depending on model. HP firmware sometimes hides USB entries — look under Boot Options in the full setup.
ASUS / MSI / Gigabyte (desktops)
-
On motherboards, you can also set USB as first boot device in BIOS. Many motherboard UEFI screens offer a quick-boot order widget.
Macs (Intel)
-
Plug in the USB, power on and hold the Option (⌥) key to open the Startup Manager. Choose the USB device (it will show as an external volume).
-
Modern Apple Silicon (M1/M2) Macs use a different workflow — to boot external devices, shut down, then press and hold the power button to open the startup options screen; external boot permission may require adjustments in Recovery → Startup Security Utility. Apple Silicon has stricter rules for external boot; consult Apple documentation if you must allow booting from external media.
Chromebooks
-
Most Chromebooks are locked-down; enabling Developer Mode is usually required to boot external OS media. This process wipes the device and changes security posture — only do it if you know what you’re doing.
Raspberry Pi and single-board computers
-
Raspberry Pi boots from SD or (on newer models) USB. For Pi, you don’t use BIOS: write the image directly to an SD card (or USB) with Etcher, insert it and power on. Some Pi models require setting boot order in OTP or enabling USB boot mode by changing a config.
VMs (Virtual Machines)
-
In virtual machines (VirtualBox, VMware, Hyper-V) you attach the ISO as a virtual CD or the USB as a passthrough device and set the VM’s boot order to the virtual device. There’s no firmware keypress; change VM settings.
Older desktops without USB boot support
-
If the firmware does not support USB boot, consider using a CD/DVD, installing from network (PXE), or upgrading the BIOS/UEFI if the vendor provides an update.
F. Troubleshooting when you get stuck
-
No boot devices listed: check USB creation; try another USB stick; confirm the ISO boots on another PC.
-
Boot loops or immediate reboots: the USB may have been written incorrectly; re-create it with another tool.
-
Installer starts but complains about missing drivers (Windows on NVMe): you may need to load NVMe or SATA drivers during the Windows installer, or choose a different USB port (rear ports on desktops).
-
UEFI menu hides the USB: enable “Legacy/CSM” or disable “Secure Boot” temporarily. After install, you can restore settings.
Step 4 — Boot and use or install
Once you’ve selected the USB device from the boot menu:
-
Live Linux: you’ll usually have options like “Try without installing” or “Install.” Use the live session to test hardware and data access.
-
Installer: follow the installer wizard (Windows or Linux) to install on the target drive. Make backups first.
-
Ventoy/multiboot: select the ISO from Ventoy’s menu.
When finished, shut down, remove the USB, and boot normally — unless you intentionally want to keep booting from the USB.
Troubleshooting quick-reference
-
USB not listed → try different port, try another PC, enable USB boot in firmware.
-
“Secure Boot” block → disable Secure Boot or use a signed image.
-
ISO > 4 GB not writing → use Rufus or Ventoy (supports large files).
-
Mac (Intel) → hold Option (⌥) at startup.
-
Raspberry Pi → write image to SD with Etcher and power on.
Best practices & tips
-
Keep a USB drive labeled and ready for emergency repairs.
-
Use USB 3.0 for speed and choose high-quality flash drives.
-
Back up important data before installing.
-
If you need multiple ISOs, consider Ventoy for convenience.
-
Keep firmware (BIOS/UEFI) up to date when possible — updates can add better USB support.
Closing
Booting from a USB flash drive gives you flexibility and power: portable OSes, rescue environments, and easy installers.
The key to success is preparing the USB correctly and knowing how to access or configure your device’s firmware — which is why the detailed BIOS/UEFI guidance above is essential.
If you want, I can produce a short quick-reference graphic for the common vendor keys (F12, Esc, Del, Option, etc.) or a step-by-step Ventoy/Rufus walkthrough with screenshots for lookkle.com — tell me which one and I’ll create it next.