Reading Time 6
Number of Words 1307
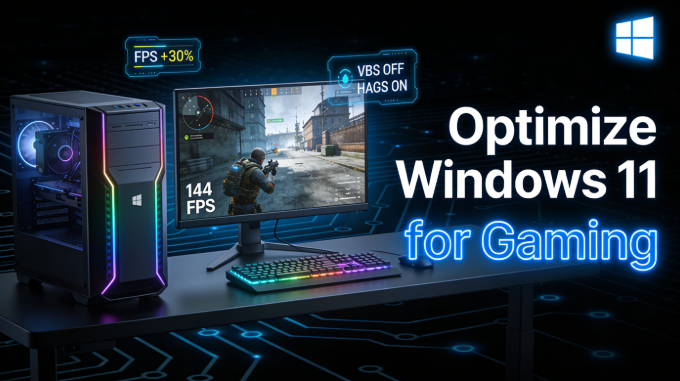
Windows 11 has dozens of CPU and GPU-consuming processes, security services, and virtualization features that your game needs.
Disabling the correct ones and enabling the gaming-first options can give you between 5% and 30% more FPS depending on your hardware.
This guide separates the tweaks that actually work from those that are completely useless.
⚠️ Before you begin: create a system restore point (
Panel de control → Sistema → Protección del sistema → Crear). Some changes affect the security of your computer. Read them before applying them.
Level 1: Basic Windows Configuration (no risk, maximum impact)
1. Activate Game Mode
Settings → System → Game Mode → Enable
Game Mode prioritizes the CPU and GPU for active gameplay, reduces update interruptions, and suppresses notifications during gameplay. It's the first setting you should enable and has an immediate impact on frame pacing and stuttering.
2. Activa Hardware Accelerated GPU Scheduling (HAGS)
Settings → System → Display → Graphics → Change default graphics settings → Hardware-accelerated GPU scheduling → Enable
HAGS allows the GPU to manage its own scheduling memory instead of relying on the Windows processor, reducing latency and improving frame pacing. Its impact varies depending on the GPU and drivers, so check your FPS before and after.
3. Change the Power Plan to "Maximum Performance"
Control Panel → Power Options → Maximum Performance
If it doesn't appear, add it from CMD (as administrator):
powercfg -duplicatescheme e9a42b02-d5df-448d-aa00-03f14749eb61
This plan unlocks the CPU and GPU to their maximum frequency without throttling. Essential for desktop PCs and highly recommended for laptops plugged into a power outlet. Simply switching from "Balanced" to "Maximum Performance" can deliver 5–20% more FPS on low- to mid-range systems.
4. Configure the game to use the correct GPU
Settings → System → Display → Graphics → Add app → Options → High performance
It prevents Windows from using the integrated GPU instead of the dedicated one, which can happen on some laptops or systems with integrated Intel/AMD graphics.
5. Adjust the screen refresh rate
Settings → System → Display → Advanced display → Choose the maximum available frequency (144Hz, 165Hz, 240Hz...)
Windows may start at 60Hz even if your monitor supports more. Checking this takes 10 seconds and can be the difference between 60 and 144fps.
6. Disable startup apps and background processes
Settings → Apps → Startup → Disable anything you don't need at startup
And in Task Manager ( Ctrl+Shift+Esc): identify processes that are unnecessarily consuming RAM/CPU (Discord, OneDrive, Spotify in the background, etc.) and close them before playing. This can free up 10–20% of RAM and reduce microstuttering.
Level 2: Security/performance tweaks (high impact, involve trade-offs)
⚠️ These settings improve performance but reduce some security layers. Recommended only for dedicated gaming PCs with safe browsing habits and Windows Defender enabled.
7. Desactiva Memory Integrity (Core Isolation)
Windows Security → Device Security → Kernel Isolation → Memory Integrity → Disable
Memory Integrity is a security feature designed for corporate environments that adds a layer of virtualization to every system call. In gaming, this translates to CPU overhead and micro-stuttering. Disabling it can result in 5–15% more FPS in CPU-bound titles.
8. Desactiva VBS (Virtualization Based Security)
Open CMD as administrator and run:
bcdedit /set hypervisorlaunchtype off
Restart your computer. To verify that it is disabled:
systeminfo | find "Virtualization-based security"
It must show: Virtualization-based security: Not Enabled
VBS creates a virtualized environment that protects parts of the operating system, but in gaming it consumes CPU cycles that should be used to render frames. Independent benchmarks have shown FPS drops of 5–20% in CPU-bound titles when VBS is active, especially in shooters and MMOs.
9. Disable the SysMain service (formerly SuperFetch)
Run (Win+R) → services.msc → SysMain → Double-click → Startup type: Disabled → Stop
SysMain preloads frequently used programs into RAM, which is useful for general use but consumes RAM and CPU during gaming. On systems with 16GB or more of RAM, its impact is less significant; on systems with 8GB, it can make a noticeable difference.
10. Disable Windows Search indexing
Run → services.msc → Windows Search → Disable
Or from the Registry Editor:
HKEY_LOCAL_MACHINE\SYSTEM\CurrentControlSet\Services\WSearch → Start = 4
Continuous indexing consumes disk and CPU resources in the background. On fast NVMe SSDs, the impact is minimal; on HDDs or SATA SSDs, it can cause visible microstuttering during gameplay.
Level 3: GPU Optimization (NVIDIA and AMD)
For NVIDIA cards
Update drivers with a clean installation:
-
Download the driver from nvidia.com.
-
In the installer, choose Custom → Clean Install .
This removes old configurations that may cause conflicts and stuttering.
Disable the NVIDIA Overlay (GeForce Experience):
GeForce Experience → Settings → General → Game Overlay → Disable
The NVIDIA overlay is one of the most common causes of stuttering, especially in Warzone, Fortnite, and games with anti-cheat. Disabling it can instantly eliminate micro-freezes.
NVIDIA Control Panel — key gaming settings:
| Adjustment | Recommended value |
|---|---|
| Power management mode | Prefer maximum performance |
| Vertical synchronization | Disable (in the NVIDIA panel) |
| Shader cache size | 10 GB |
| Low latency mode | Activated (or Ultra in competitive mode) |
| Texture filtering - Quality | High performance |
| OpenGL GPU | Your dedicated GPU (not "Auto") |
Increase the shader cache to 10 GB:
NVIDIA Control Panel → Manage 3D settings → Shader cache size → 10 GB
If the default shader cache fills up (~4GB), the driver starts recompiling shaders in real time, causing stuttering. With 10GB, you eliminate this problem in virtually any modern game.
For AMD cards
-
Activate Radeon Anti-Lag (reduces input lag to 31ms according to AMD).
-
Enable Radeon Chill disabled in competitive games (may limit FPS).
-
Use AMD Software: Adrenalin for clean driver installation.
-
Enable SAM (Smart Access Memory / Resizable BAR) if your CPU and motherboard support it — it can provide 5–15% performance gains in some games.
Level 4: Registry Tweaks (advanced)
⚠️ Back up the registry first: Regedit → File → Export → Save as backup_registry.reg
CPU/GPU priority for gaming
Navigate to:
HKEY_LOCAL_MACHINE\SOFTWARE\Microsoft\Windows NT\CurrentVersion\Multimedia\SystemProfile\Tasks\Games
Modify or create these values:
-
GPU Priority(DWORD) = 8 -
Priority(DWORD) = 6 -
Scheduling Category(String) = High -
SFIO Priority(String) = High
This tells Windows that game processes should receive high priority from the CPU, GPU, and system I/O.
Reduce network latency for online gaming
Navigate to:
HKEY_LOCAL_MACHINE\SOFTWARE\Microsoft\Windows NT\CurrentVersion\Multimedia\SystemProfile
-
NetworkThrottlingIndex(DWORD) = ffffffff (disables network throttling) -
SystemResponsiveness(DWORD) = 0 (prioritizes the foreground completely)
Win32PrioritySeparation (foreground process priority)
Navigate to:
HKEY_LOCAL_MACHINE\SYSTEM\CurrentControlSet\Control\PriorityControl
-
Win32PrioritySeparation(DWORD) = 26 (decimal) o 0x1a (hex)
This maximizes the priority of the foreground process (your game) over background processes.
Level 5: BIOS/UEFI (the most impactful of all)
Enable XMP / EXPO (essential if you have DDR4/DDR5)
Most RAM kits are sold at 3200MHz, 3600MHz, or 6000MHz, but by default the system runs them at their base speed (2133MHz or 2400MHz). Enabling XMP (Intel) or EXPO (AMD) in the BIOS applies the correct speed profile.
Result: more bandwidth for CPU and GPU, especially noticeable in systems with integrated GPUs or in memory-intensive games such as RTS and MMOs.
Activa Resizable BAR / SAM
On modern motherboards with Intel 10th Gen+ or AMD Ryzen 5000+ processors, this allows the GPU to access all of its VRAM at once instead of in 256MB chunks. Some games gain up to 15% performance.
Disable virtualization features if you don't need them
CPU Configuration → Intel VT-d / AMD IOMMU → Disabled
If you don't use virtual machines, Hyper-V, or WSL2, disabling these options in the BIOS reduces the CPU overhead generated by VBS at the hardware level.
Complete checklist (summary by impact)
| Tweak | Impact | Risk | Level |
|---|---|---|---|
| "Maximum Performance" Energy Plan | High | None | Basic |
| Activate Game Mode | Half | None | Basic |
| Activate HAGS | Half | None | Basic |
| Disable startup apps | Half | None | Basic |
| Disable NVIDIA Overlay | Alto (stutters) | None | GPU |
| Clean NVIDIA/AMD driver | High | None | GPU |
| Optimized NVIDIA panel | High | None | GPU |
| Enable XMP/EXPO in BIOS | High | None | BIOS |
| Activate ReBAR/SAM | Medium-High | None | BIOS |
| Desactivar Memory Integrity | Medium-High | Medium security | Advanced |
| Disable VBS | Medium-High (5–20%) | Low security | Advanced |
| Deactivate SysMain | Medium (with 8GB RAM) | None | Advanced |
| Registry CPU/GPU Priority | Half | Low | Registry |
| Disable Windows Search | Low-Medium | None | Advanced |
What DOESN'T work (myths you can ignore)
-
"Cleaning the registry with CCleaner improves FPS": No. A clean registry has no measurable impact on gaming.
-
"Disable all Windows services": Risk of instability with no real benefit. Disable only the documented services.
-
"Manually changing core affinity improves FPS": Only useful in very specific cases with older CPUs. On modern Ryzen or Intel processors, the scheduler does it better than you.
-
"Set everything to high priority from Task Manager": If everything is set to high priority, then nothing is truly high priority. Only set it to high priority for the game process.